Overview
What does Kubeflow do?
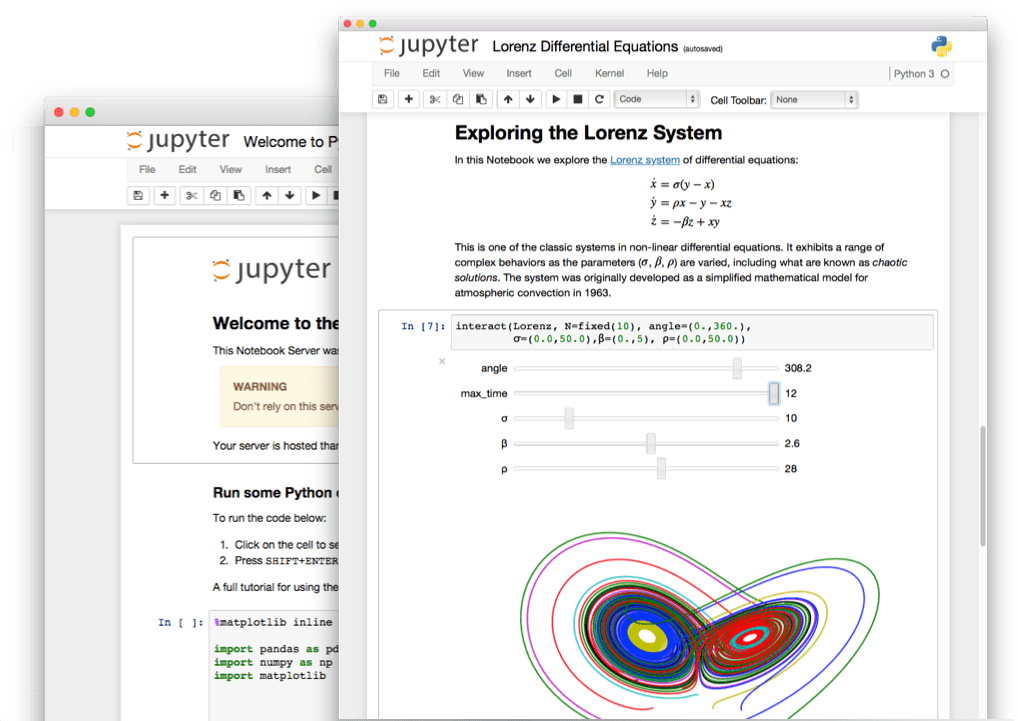
Kubeflow runs your workspaces. You can have notebook servers (called Jupyter Servers), and in them you can create analyses in R and Python with interactive visuals. You can save and upload data, download it, and create shared workspaces for your team.
Let's get started!
Setup
Log into Kubeflow
Log into the Azure Portal using your Cloud Credentials
You have to login to the Azure Portal using your StatCan cloud credentials.
first.lastname@cloud.statcan.ca or StatCan credentials
first.lastname@statcan.gc.ca. You can do that using
the Azure Portal.

- Log into Kubeflow
- Ensure that your project's namespace is selected from the namespaces drop down menu, and example in the screenshot is "aaw-team"
- Navigate to the Notebook Servers tab
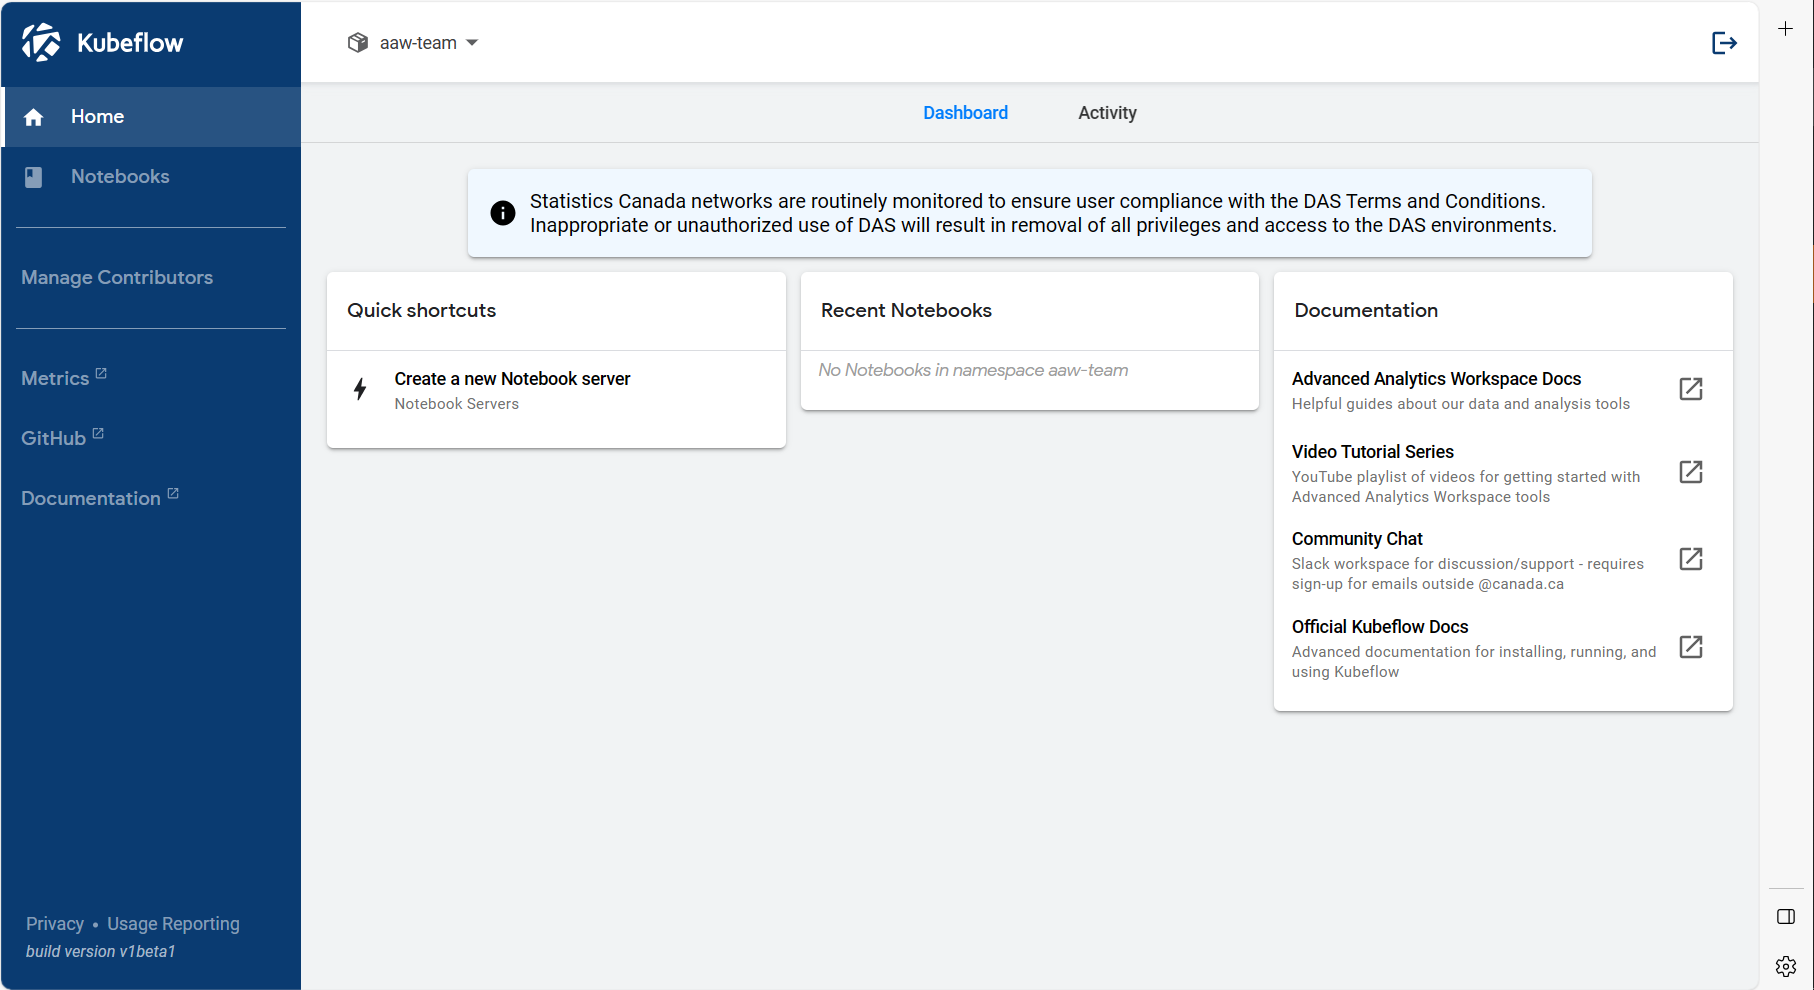
- Then click + New Server
Server Name and Namespace
- You will get a template to create your notebook server. Note: the name of your server can consist of only lower-case letters, numbers, and hyphens. No spaces, and no underscores.
Image
You will need to choose an image. There are JupyterLab, RStudio, Ubuntu remote desktop, and SAS images available. The SAS image is only available for StatCan employees (due to license limitations), the others are available for everyone. Select the drop down menu to select additional options within these (for instance, CPU, PyTorch, and TensorFlow images for JupyterLab).
Check the name of the images and choose one that matches what you want to do. Don't know which one to choose? Check out your options here.

Custom images
A user can use a custom image, in which case they need to know the exact sha of the image and its name.
The user custom images are provided via the aaw-contrib-containers repo which upon pushes to the main branch, will also push the image to our ACR. After that action has successfully completed, you may use the custom image.
Upon the creation of a notebook click 'Advanced options', check the checkbox for custom image and enter the image by entering k8scc01covidacr.azurecr.io/[your-image-name-here]:[sha].

Once the notebook is created, if the status is not ready in a few minutes, click on it's name to see the details page. Then the 'Events' tab allows you to know exactly what is happening. If necessary, reach out to the help channel on slack if the problem persists.
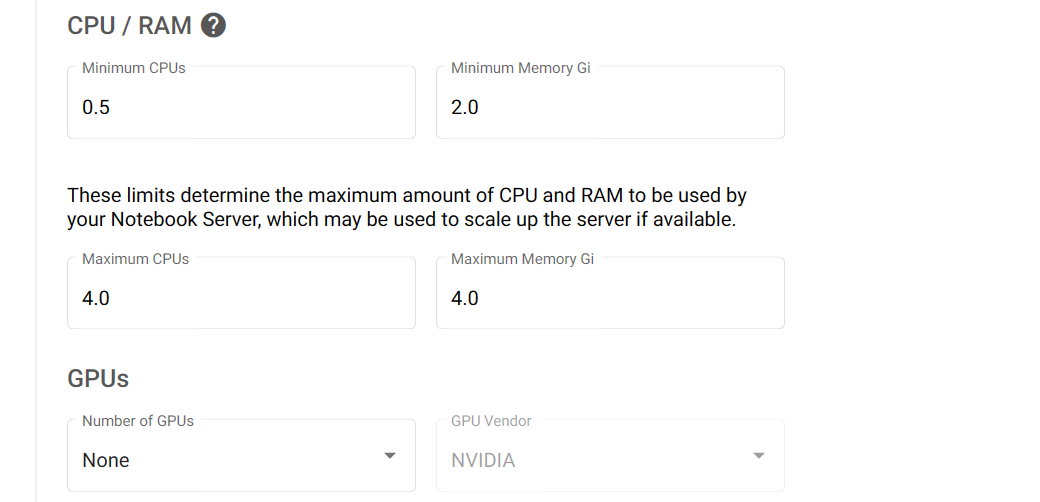
CPU and Memory
At the time of writing (December 23, 2021) there are two types of computers in the cluster
- CPU:
D16s v3(16 CPU cores, 64 GiB memory; for user use 15 CPU cores and 48 GiB memory are available; 1 CPU core and 16 GiB memory reserved for system use). - GPU:
NC6s_v3(6 CPU cores, 112 GiB memory, 1 GPU; for user use 96 GiB memory are available; 16 GiB memory reserved for system use). The available GPU is the NVIDIA Tesla V100 GPU with specifications here.
When creating a notebook server, the system will limit you to the maximum specifications above. For CPU notebook servers, you can specify the exact amount of CPU and memory that you require. This allows you to meet your compute needs while minimising cost. For a GPU notebook server, you will always get the full server (6 CPU cores, 96 GiB accessible memory, and 1 GPU). See below section on GPUs for information on how to select a GPU server.
In the advanced options, you can select a higher limit than the number of CPU cores and RAM requested. The amount requested is the amount guaranteed to be available for your notebook server and you will always pay for at least this much. If the limit is higher than the amount requested, if additional RAM and CPU cores are available on that shared server in the cluster your notebook server can use them as needed. One use case for this is jobs that usually need only one CPU core but can benefit from multithreading to speed up certain operations. By requesting one CPU core but a higher limit, you can pay much less for the notebook server while allowing it to use spare unused CPU cores as needed to speed up computations.
GPUs
If you want a GPU server, select 1 as the number of GPUs and NVIDIA as the GPU
vendor (the create button will be greyed out until the GPU vendor is selected if
you have a GPU specified). Multi-GPU servers are currently supported on the AAW
system only on a special on-request basis, please contact the AAW maintainers if
you would like a multi-GPU server.
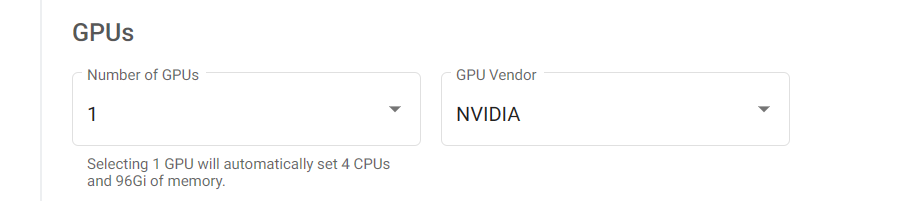
As mentioned before, if you select a GPU server you will automatically get 6 CPU cores and 112 GiB of memory.
Use GPU machines responsibly
GPU machines are significantly more expensive than CPU machines, so use them responsibly.
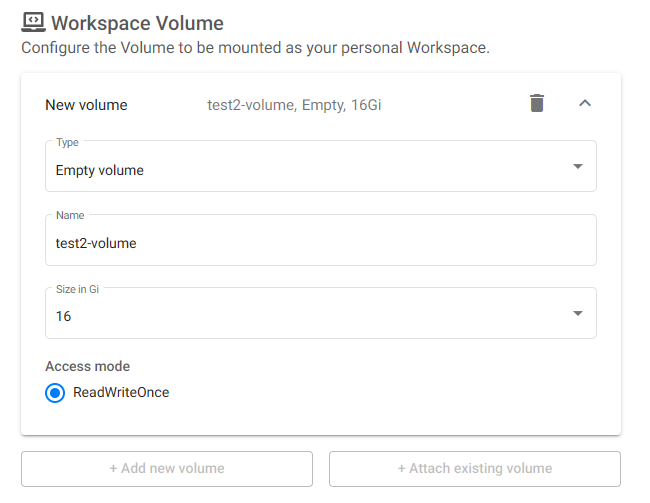
Workspace Volume
You will need a workspace volume, which is where the home folder will be mounted. There are various configuration options available:
- You can either reuse an existing workspace volume from before, or create a new one.
- You can specify the size of the workspace volume, from 4 GiB to 32 GiB.
Check for old volumes by looking at the Existing option
When you create your server you have the option of reusing an old volume or creating a new one. You probably want to reuse your old volume.
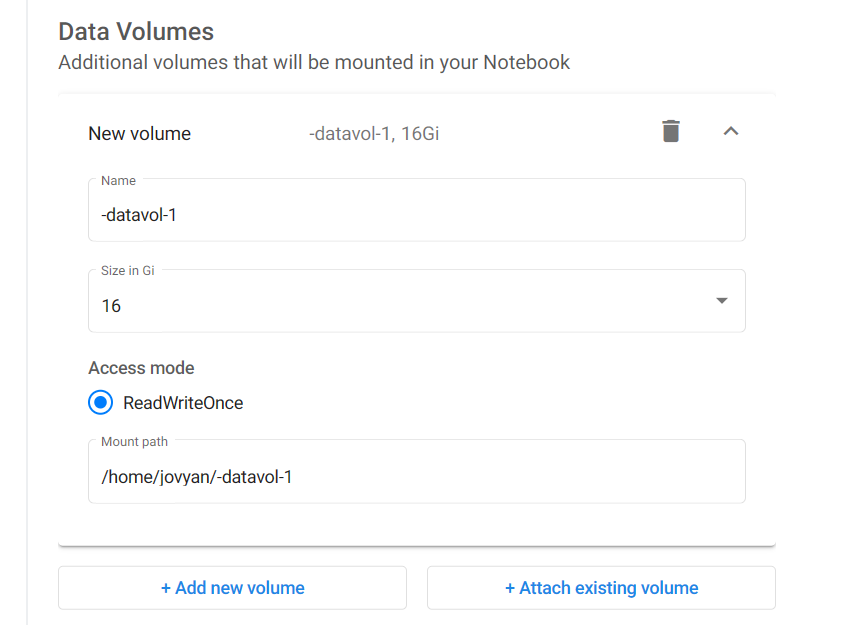
Data Volumes
You can also create data volumes that can be used to store additional data. Multiple data volumes can be created. Click the add new volume button to create a new volume and specify its configuration. Click the attach existing volume button to mount an existing data volume to the notebook server. There are the following configuration parameters for data volumes:
- Name: Name of the volume.
- Size in GiB: From 4 GiB to 512 GiB.
- Mount path: Path where the data volume can be accessed on the notebook server, by
default
/home/jovyan/vol-1,/home/jovyan/vol-2, etc. (incrementing counter per data volume mounted).
When mounting an existing data volume, the name option becomes a drop-down list of the existing data volumes. Only a volume not currently mounted to an existing notebook server can be used. The mount path option remains user-configurable with the same defaults as creating a new volume.
The garbage can icon on the right can be used to delete an existing or accidentally created data volume.
Configurations
If configurations are available, they are presented here as checkboxes. Currently no configuration exist.
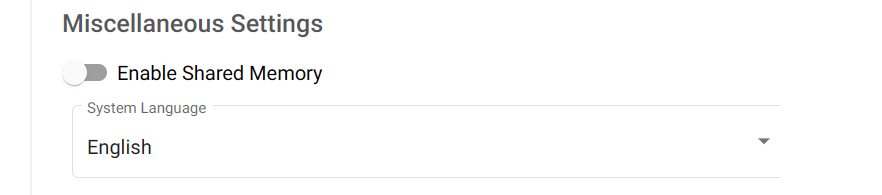
Miscellaneous Settings
The following can be customized here:
- Enable Shared Memory: This is required if you use PyTorch with multiple data loaders, which otherwise will generate an error. If using PyTorch make sure this is enabled, otherwise it does not matter unless you have another application that requires shared memory.
- System Language: Can specify English or French here.
And... Create!!!
- If you're satisfied with the settings, you can now create the server! It may take a few minutes to spin up depending on the resources you asked for. GPUs take longer.
Your server is running
If all goes well, your server should be running!!! You will now have the option to connect, and try out Jupyter!
Once you've got the basics ...
Share your workspace
In Kubeflow every user has a namespace that contains their work (their notebook servers, pipelines, disks, etc.). Your namespace belongs to you, but can be shared if you want to collaborate with others. For more details on collaboration on the platform, see Collaboration.