Kubeflow Volumes (Disks)
Kubeflow Volumes are similar in concept to the hard disk drives you are used to on your Windows, Mac or Linux Desktop. Kubeflow Volumes are sometimes just called disks and are backed by fast solid state drives (SSDs) under the hood!
Setup
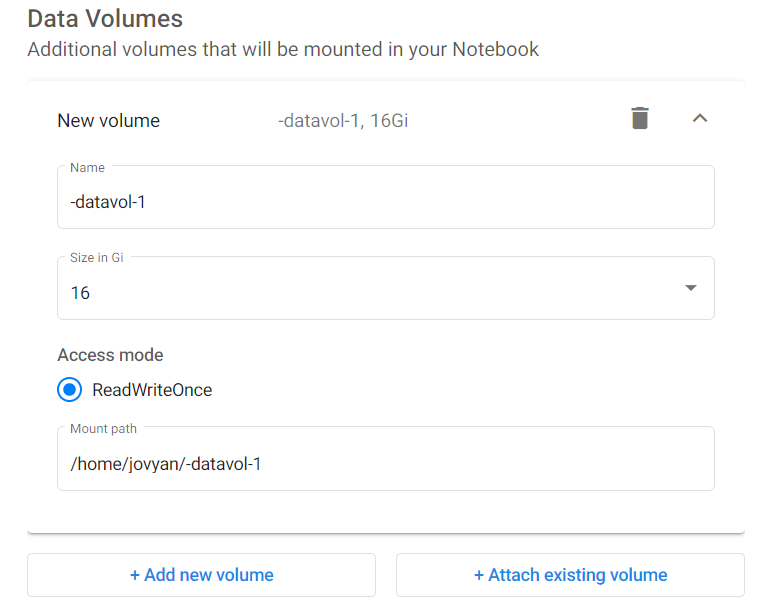
When creating your notebook server, you request disks by adding Data Volumes to your notebook server (pictured below, with go to Advanced Options). They are automatically mounted at the directory (Mount Point) you choose, and serve as a simple and reliable way to preserve data attached to a Notebook Server.
You pay for all disks you own, whether they're attached to a Notebook Server or not.
As soon as you create a disk, you're paying for it until it is deleted, even if it's original Notebook Server is deleted. See Deleting Disk Storage for more info.
Once you've got the basics...
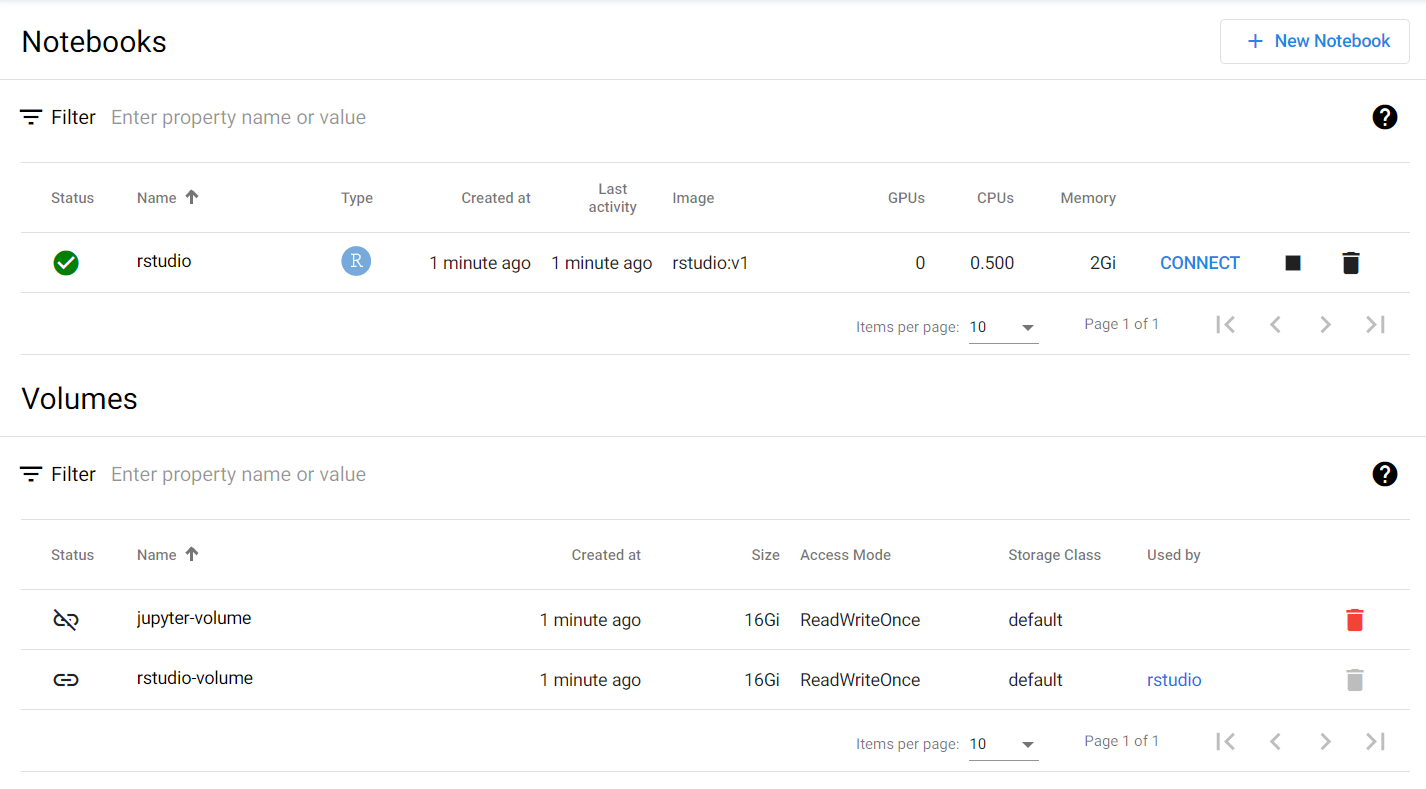
When you delete your Notebook Server, your disks are not deleted. This let's you reuse that same disk (with all its contents) on a new Notebook Server later (as shown above with Type = Existing and the Name set to the volume you want to reuse). If you're done with the disk and it's contents, delete it.
Deleting Disk Storage
To see your disks, check the Notebook Volumes section of the Notebook Server page (shown below). You can delete any unattached disk (icon on the left) by clicking the trash can icon.
Pricing
Pricing models are tentative and may change.
As of writing, pricing is covered by the platform for initial users. This guidance explains how things are expected to be priced priced in future, but this may change.
When mounting a disk, you get an Azure Managed Disk. The Premium SSD Managed Disks pricing shows the cost per disk based on size. Note that you pay for the size of disk requested, not the amount of space you are currently using.
Tips to minimize costs.
You can minimize costs by suspending your notebook servers when not in use. A typical workflow may look like:
- Create a Notebook Server with the appropriate about of storage allocated to Workspace and Data Volumes.
- Do work throughout the day, saving results to the Data or Workspace Volume, depending on your needs.
- At the end of the workday, suspend your Notebook Server to avoid paying for it overnight.
- At 9AM the next day, resume your Notebook Server and continue your work.
- Tip: You can migrate your Workspace or Data Volume to a new notebook server without losing data as the destruction of the notebook server does not affect any attached Workspace or Data Volume.